
Description
SureForms Pro Plugin WordPress Features
- Keyboard Navigation
Users can navigate and interact with forms using the keyboard. - Screen Reader Compatibility
Allows users with visual impairments to complete forms. - Color Contrast
Contrast to ensure readability for users with visual impairments. - Form Labels and Helpers
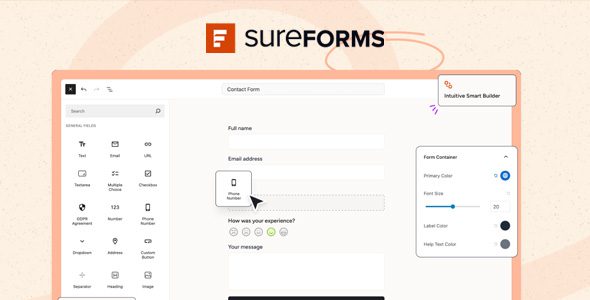
Clear labels and instructions help users understand needs. - Intuitive Smart Builder
Build forms without codes and within minutes! Simply drag and drop form fields. Or even better, ask AI to get started! - All Input Types You Need
Choose from over 20 input fields. From text boxes to dropdowns, checkboxes, and more, we’ve got you covered. - Beautiful Form Styling
Get started quickly with our beautifully generated forms – covering various use cases, saving you time and effort. - Accessible and Compliant
Build forms easily usable by everyone, including people with disabilities, and comply with relevant regulations. - Form Landing Pages
Offer forms on their own standalone landing pages for quick deployment and better lead capture without embedding. - Dynamic Data
Personalize your forms with dynamic content. Insert pre-populated information, like a visitor’s name or email address. - Conditional Fields
Create dynamic forms that adapt to user input. Show or hide form fields and sections based on the responses to previous fields. - Multi-step forms
Break longer forms into manageable steps – Guide visitors through your form one step at a time, increasing completion rates. - Responsive Forms
SureForms ensures your forms look great on all devices, providing a seamless experience for users regardless of their device.
How to Install WordPress Themes
- Begin by downloading the theme.zip file from the source onto your local computer.
- From your WordPress Administration area, head to Appearance > Themes and click Add New
- The Add New theme screen has a new option, Upload Theme
- The theme upload form is now open, click Choose File, select the theme zip file on your computer and click Install Now.
How to install WordPress Themes using FTP
- Launch Filezilla, enter your login details and click Quickconnect.
- The following window contains Remote Site and a root directory (the root directory is your site’s name). Select /rootdirectory/web/content/wp-content/themes.
- In the Local Site window, select the folder containing your saved theme, right click for more options and hit Upload.
- You’ve now successfully uploaded your theme to WordPress. To finalize, log in to your control panel, head to Appearance > Themes and hover your mouse over the new theme. Now click Activate.
- All that’s left is to check out your new theme and see how you like your new site design.
How to install WordPress Plugin Manually
- From your WordPress dashboard, choose Plugins > Add New.
- Click Choose File, locate the plugin .zip file, then click Install Now.
- After the installation is complete, click Activate Plugin.
To add a plugin to your WordPress website via FTP
- Download the desired plugin as a .zip file from either the WordPress directory or a third-party source.
- Extract (or unzip) the plugin file. The unzipped folder will appear with the same name as the .zip file.
- Next, you’ll need to connect to your WordPress website’s server with FTP. To do this, you can use an FTP client that connects to the host server to transfer files.
- Once you open the FTP client, connect to your website with a username and password. You might need to obtain these credentials from your hosting provider.
- In your WordPress file directory, open the wp-content folder, then open the plugins folder.
- Upload the unzipped plugin folder that you downloaded to the plugins folder.
- Return to your WordPress dashboard and select Plugins > Installed Plugins. Find your new plugin and click Activate.

Reviews
There are no reviews yet.