
Description
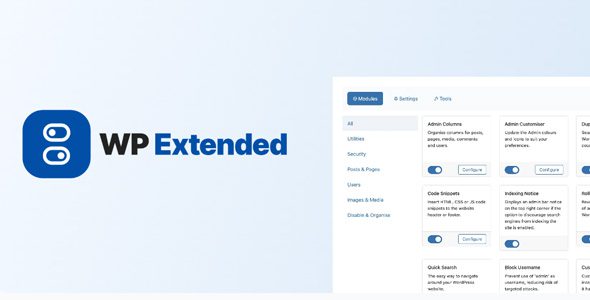
WP Extended Pro Plugin Features
- Admin Columns
Organise columns for posts, pages, media, comments and users. - Admin Customiser
Update the Admin colours and icons to suit your preferences. - Quick Search
The easy way to navigate around your WordPress website. - Disk Usage Widget
Adds a widget to your WordPress dashboard display disk usage statistics. - Indexing Notice
An admin bar notice displaying an indexing status notice. - Duplicate Menu
Seamlessly clone your WordPress Menus in just a couple of clicks. - Code Snippets
Insert HTML, CSS or JS code snippets to the website header or footer. - Pixel Tag Manager
Easily manage the pixel tags for Google Analytics, Facebook and Pinterest. - Rollback Manager
Revert to previous versions of any theme or plugin from WordPress.org - SMTP Email
Reliably ensure the successful delivery of your emails with SMTP. - Hide Admin Notices
Hide unnecessary admin notices, allowing for a more focused and efficient admin experience. - Debug Mode
Enable Debug Mode to easily troubleshoot and resolve issues, providing detailed error logs and warnings for developers. - Limit Login Attempts
Prevent brute-force attacks by limiting the number of login attempts. - Block Usernames
Prevent use of certain usernames, reducing the risk of targeted attacks - Custom Login URL
Customize your login URL to increase security by making it harder for unauthorised access. - Hide WP version
Enhance security by hiding the WordPress version number from your site’s source view, thwarting targeted attacks. - Maintenance Mode
Switch your site to Maintenance Mode for updates or changes. - Disable XML-RPC
Increase security by disabling XML-RPC to prevent external applications from interfacing with your WordPress site, reducing vulnerability to attacks. - User Enumeration
Secures against hackers scanning for usernames, blocking user enumeration attempts. - User Last Login
Display the last login timestamps of users, monitoring user activity and managing user accounts effectively. - Disable Auto Updates
Gain full control over your site by manually managing updates, ensuring compatibility before applying new changes. - Clean Dashboard
Streamlines admin dashboard by hiding unwanted elements for a cleaner interface. - Disable Blog
Transform your site into a non-blogging platform by disabling blog-related features. - Disable Comments
Eliminate comment sections from your site, reducing spam and moderating efforts. - Hide Admin Bar
Keep the admin bar hidden for specific user roles or on specific pages. - Disable RSS Feeds
Ideal for websites that don’t require syndication or want to keep content exclusive to their platform. - Menu Editor
Customise your admin menus, including reordering, hiding, or renaming menu items. - Classic Editor
Switch back to the classic WordPress editor if preferred, offering a simpler content interface. - Gutenberg Widgets
Disable the Gutenberg widgets for those who prefer the classic WordPress interface.
Download WP Extended Pro Plugin
Note: If you are having trouble with WP Extended Pro Plugin Free Download Latest Version Latest Update, try to disable AD blocking for the site or try another Web Browser. If disabling AD blocker or change Web Browser not help to you, please contact us.
How to Install WordPress Themes
- Begin by downloading the theme.zip file from the source onto your local computer.
- From your WordPress Administration area, head to Appearance > Themes and click Add New
- The Add New theme screen has a new option, Upload Theme
- The theme upload form is now open, click Choose File, select the theme zip file on your computer and click Install Now.
How to install WordPress Themes using FTP
- Launch Filezilla, enter your login details and click Quickconnect.
- The following window contains Remote Site and a root directory (the root directory is your site’s name). Select /rootdirectory/web/content/wp-content/themes.
- In the Local Site window, select the folder containing your saved theme, right click for more options and hit Upload.
- You’ve now successfully uploaded your theme to WordPress. To finalize, log in to your control panel, head to Appearance > Themes and hover your mouse over the new theme. Now click Activate.
- All that’s left is to check out your new theme and see how you like your new site design.
How to install WordPress Plugin Manually
- From your WordPress dashboard, choose Plugins > Add New.
- Click Choose File, locate the plugin .zip file, then click Install Now.
- After the installation is complete, click Activate Plugin.
To add a plugin to your WordPress website via FTP
- Download the desired plugin as a .zip file from either the WordPress directory or a third-party source.
- Extract (or unzip) the plugin file. The unzipped folder will appear with the same name as the .zip file.
- Next, you’ll need to connect to your WordPress website’s server with FTP. To do this, you can use an FTP client that connects to the host server to transfer files.
- Once you open the FTP client, connect to your website with a username and password. You might need to obtain these credentials from your hosting provider.
- In your WordPress file directory, open the wp-content folder, then open the plugins folder.
- Upload the unzipped plugin folder that you downloaded to the plugins folder.
- Return to your WordPress dashboard and select Plugins > Installed Plugins. Find your new plugin and click Activate.


Reviews
There are no reviews yet.